Xero Stripe Integration: Automate Invoicing and Reconciliation
Discover how a xero stripe integration can streamline invoicing, automate reconciliation, and help Australian businesses get paid faster.
Payly Team
February 4, 2026
Connecting Xero and Stripe is about more than just convenience; it’s about fundamentally changing how you get paid. By adding a simple "Pay Now" button to your invoices, you empower clients to settle their bills instantly using credit cards, Apple Pay, or Google Pay. For Australian businesses, this direct link between your invoicing and payment processing is a powerful way to slash admin time and seriously improve your cash flow.
Why a Xero Stripe Integration Is a Game Changer

If you're a freelancer, run an agency, or own a small business in Australia, you know the feeling. That gap between sending an invoice and actually seeing the money hit your account can be a major source of stress. Chasing up late payments is not just frustrating; it’s a time-suck that pulls you away from what you should be doing: growing your business. This is precisely the problem the Xero Stripe integration was built to solve.
It transforms your invoice from a static document into a dynamic payment gateway. You’re no longer just hoping a client gets around to a manual bank transfer; you're giving them a secure, effortless way to pay you on the spot. It seems like a small tweak, but the ripple effect on your day-to-day operations is huge.
Let's take a quick look at what this integration really brings to the table.
Xero and Stripe Integration at a Glance
| Feature | Benefit for Your Business |
|---|---|
| "Pay Now" Buttons | Makes it incredibly easy for clients to pay invoices instantly, reducing payment friction. |
| Automated Reconciliation | Stripe payouts and fees are automatically synced to Xero, making bank recs a breeze. |
| Multi-Currency Support | Seamlessly accept and account for payments from international clients in their own currency. |
| Real-Time Updates | Invoices are marked as paid automatically the moment a payment is successful. |
| Reduced Admin Work | Frees up hours of manual data entry and payment chasing each month. |
| Improved Cash Flow | Drastically shortens the average time it takes for you to get paid. |
Essentially, this integration creates a direct, automated link between getting paid and balancing your books, taking much of the manual work off your plate.
Accelerate Your Cash Flow
The most immediate and obvious benefit is speed. When you remove the hurdles and make it dead simple for a client to pay, they’re far more likely to do it right away. The numbers speak for themselves.
On average, Xero customers in Australia who connect Stripe get their invoices paid 14 days faster. Think about what that kind of improvement could do for your business's financial stability. By automatically accepting a range of payment methods directly on your Xero invoices, your billing process becomes a well-oiled machine. You can read more about this powerful partnership in Stripe's newsroom.
By embedding a payment link directly into your invoice, you're not just asking for money; you're providing the tool to send it. This simple shift in approach makes it easier for clients to pay on the spot, rather than putting it off for later.
Simplify Your Financial Admin
Getting paid faster is fantastic, but the benefits don’t stop there. The integration also brings a huge amount of automation to your bookkeeping, which is where you really start saving time. Manually matching bank deposits to invoices and trying to account for transaction fees is a recipe for headaches and errors. The Xero Stripe integration handles all of that for you.
Here’s how it works in the real world:
- No More Manual Ticking: A client clicks "Pay Now" and settles up. Instantly, that invoice in Xero is automatically marked as paid. You don’t have to lift a finger.
- Reconciliation Made Easy: Stripe payments and the associated fees are fed directly into Xero. When it's time to reconcile, it's often just a one-click confirmation instead of a manual treasure hunt.
- Fewer Costly Mistakes: The less you have to type things in yourself, the lower the risk of human error. Your financial records become more accurate, which means you can trust your reports.
This connection does more than just add a button; it builds a solid bridge between your sales and your accounting. For a deeper look into modern billing, our guide on invoicing in accounting is a great resource. Ultimately, it’s about freeing you from the repetitive admin that bogs you down, so you can focus on a clear, real-time picture of your business's financial health.
Laying the Groundwork for a Smooth Integration
Connecting two of your most important financial tools isn't something you should rush into. A little prep work before you hit "connect" on the Xero Stripe integration can be the difference between a seamless setup and a few weeks of headaches trying to untangle mismatched data.
Think of it like this: you wouldn't start building a house on a shaky foundation. Taking a few minutes to get your accounts in order ensures the connection is solid from day one. This isn't about deep technical know-how; it's just about checking a few key details to make sure both systems are ready to talk to each other properly.
Do You Have the Right Keys? Check Your Permissions
First things first, you need to make sure you have the authority to actually make the connection. In Xero, this means having either Standard + All Reports or Advisor user permissions. Anything less, and you won't be able to add or manage payment services.
Over in your Stripe account, you'll need to be an Administrator. This access is crucial for authorising the integration and tweaking the payment settings. It’s a quick check that prevents you from getting halfway through the process only to be blocked by a permissions error.
We see this all the time: someone starts the integration only to realise their user role won’t let them finish the job. Confirm you have admin-level access in both Xero and Stripe before you begin. It’s a five-minute check that can save you an hour of frustration.
Align Your Bank Accounts and Currencies
This step is non-negotiable for accurate reconciliation. The bank account you have linked in Stripe to receive your payouts must be the exact same bank account you've set up in Xero. If they don't match, you’re basically guaranteed a reconciliation nightmare later on.
Run through this quick checklist:
- Bank Account Match: Double-check which bank account is connected for payouts in your Stripe dashboard. Now, head over to Xero and make sure that same account is set up, ideally with a live bank feed.
- Currency Consistency: Your organisation's base currency in Xero needs to match your primary currency in Stripe. For most Australian businesses, this means ensuring both are set to AUD.
Getting this alignment right from the start means that when Stripe sends a payout to your bank, Xero knows precisely where to look for it, allowing the automatic matching to work its magic. If you're exploring different accounting platforms, our guide to small business accounting software in Australia provides some great context.
Get Clear on the Stripe Fee Structure
To account for your Stripe income correctly, you need to understand the costs. For Australian businesses, the standard fee for domestic card transactions is 1.75% + A$0.30. This isn't just a random number; it's a critical piece of the puzzle for your accounting setup.
Knowing the fee structure allows you to prepare your chart of accounts. It's a great idea to create a dedicated expense account in Xero called "Stripe Fees" or "Payment Processing Fees." This way, when a payment is processed, the integration can automatically split the transaction, allocating the full invoice amount to revenue and the fee to your new expense account. Before you commit, it can be helpful to see how Stripe stacks up against alternatives. A good Braintree vs Stripe comparison can offer some useful perspective.
Reconcile Everything Else First
Starting with a clean slate is one of the smartest things you can do. Before you connect the two platforms, make sure your Xero accounts are completely reconciled and up to date.
If you have old, unreconciled payments floating around, the new automated data flowing in from Stripe will only muddy the waters. By tidying up your books first, you create a clear "go-live" date. Every transaction from that point on will be handled by the new, automated workflow, ensuring your financial reports are clean and reliable right from the start.
A Practical Walkthrough of Connecting Stripe to Xero
Alright, with the groundwork covered, let's roll up our sleeves and get into the nuts and bolts of the Xero Stripe integration. This is the practical part where you actually link the two platforms, turning your standard invoices into powerful, fast-payment tools.
We'll look at two main ways to get this done. The first is the direct, native integration inside Xero itself, which is a brilliant fit for most service-based businesses. After that, we’ll explore using third-party connectors like Zapier for those who need more sophisticated, automated workflows.
Method 1: The Native Xero Integration
This is by far the most direct route. The goal here is simple: add Stripe as a payment service to your invoice branding themes within Xero. When you fire off an invoice, your client gets a big, friendly "Pay Now" button, making it ridiculously easy for them to pay you on the spot.
Here’s how you can get it set up in your Xero account:
- First, head to your organisation's settings and find Payment Services.
- Look for the Add Payment Service option and pick Stripe from the list of providers.
- You'll then be asked to either connect an existing Stripe account or create a new one. Just follow the prompts on the screen to authorise the connection.
- Once connected, and this is a crucial step people often miss, you need to apply this payment service to your invoice templates. Go to Settings, then Invoice Settings, and select the branding theme you use.
- In the theme editor, you'll see an option to attach your newly configured Stripe service. Do this, and the "Pay Now" button will appear on every invoice you create with that theme.
This direct connection is clean, straightforward, and honestly takes just a few minutes. It's the perfect starting point for most Australian freelancers and small businesses wanting to get paid faster without the fuss.
Before you dive in, this quick visual guide shows the essential prep work: checking your permissions, verifying bank details, and getting clear on the fees.
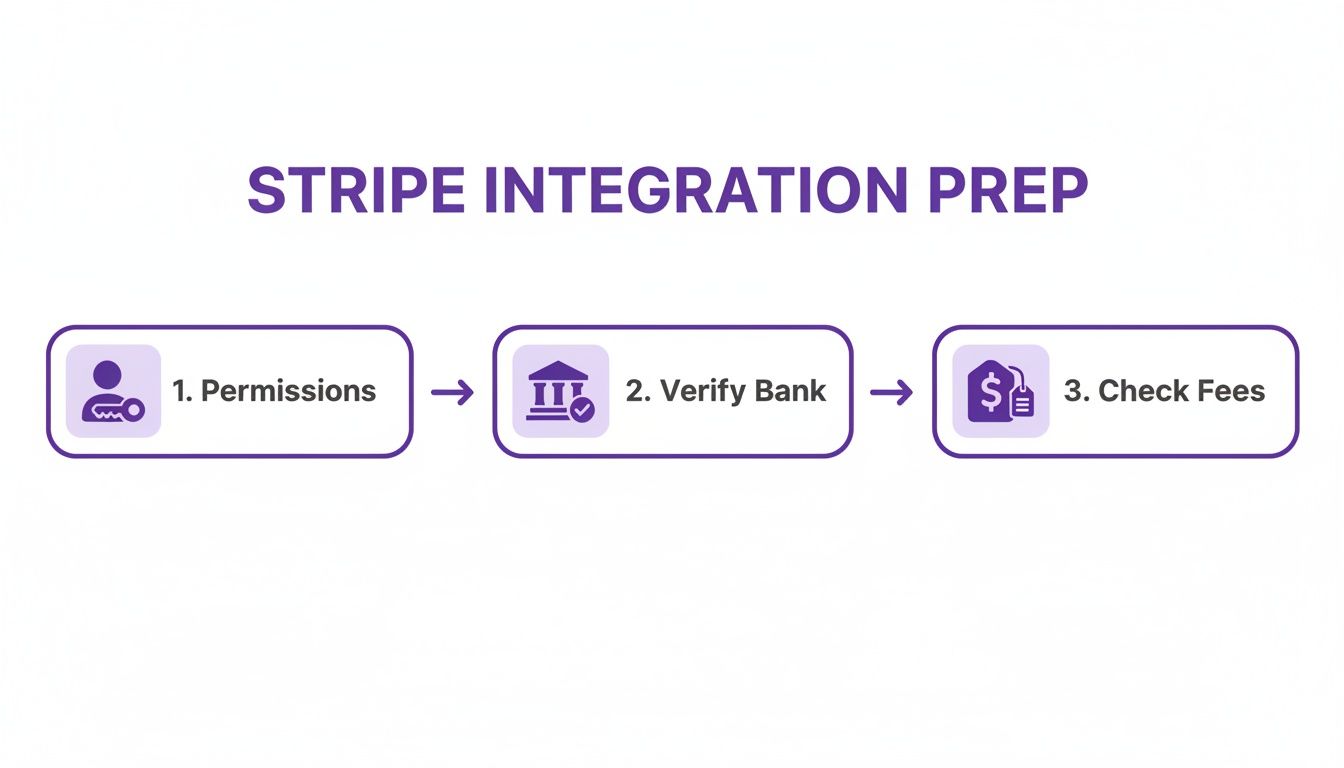
Following this flow helps make sure the technical setup goes smoothly without any unexpected hiccups.
Method 2: Using Third-Party Connectors Like Zapier
For some businesses, a direct link just doesn't cut it. What if you want a signed client proposal to automatically create a Xero invoice with a Stripe payment link ready to go? That’s where automation platforms like Zapier really shine.
Zapier acts as a super-connector between thousands of different apps. It lets you build custom workflows (they call them "Zaps") that automate tasks that would otherwise take up your valuable time. The possibilities are pretty much endless.
Connecting Xero and Stripe through a tool like Zapier is a game-changer. You're moving beyond simple payment collection and into true business process automation. It’s no longer just about getting paid faster; you’re building a self-running machine for client onboarding and billing.
For an Australian creative agency, a common workflow might look something like this:
- Trigger: A client e-signs a proposal in a tool like PandaDoc or our own platform, Payly.
- Action 1: Zapier instantly creates a new contact and a draft invoice in Xero, pulling all the details from the proposal.
- Action 2: That "Pay Now" button, powered by your Stripe integration, is automatically attached to the invoice.
- Action 3: Zapier pings your team's Slack channel, letting everyone know the project has officially kicked off.
This kind of automation completely removes manual data entry, slashes the risk of human error, and gives your clients a seamless, professional experience from the moment they say yes.
So, Which Integration Method is Right for You?
Deciding between the native integration and a third-party connector really comes down to how complex your business operations are.
| Aspect | Native Xero Integration | Third-Party Connector (e.g., Zapier) |
|---|---|---|
| Simplicity | Very High. Perfect for simple invoicing and payments. It's quick and all managed inside Xero. | Moderate. You'll need to learn how to build Zaps with triggers and actions. It’s more involved, but far more powerful. |
| Cost | Free. It’s included with your Xero subscription (though standard Stripe fees still apply to transactions). | Subscription-based. Zapier has free and paid plans that depend on how many Zaps you run and how complex they are. |
| Flexibility | Limited. It’s laser-focused on one job: adding a payment link to your Xero invoices. | Extremely High. You can connect Xero and Stripe to hundreds of other apps for end-to-end business automation. |
| Best For | Freelancers, consultants, and small businesses who just want an easy way to get paid quicker. | Agencies, high-volume businesses, and anyone looking to automate their entire client journey. |
If you're a service business sending out the same retainer invoices each month, the native integration is a no-brainer. You can set up repeating invoices in Xero with the Stripe button attached, and the whole process just hums along in the background.
But if you’re an agency onboarding several new clients every week, a Zapier workflow could save you dozens of admin hours each month. That small subscription fee often pays for itself many times over in time saved and mistakes avoided. Both methods deliver on the core promise of a Xero Stripe integration; the path you take just depends on what your business truly needs.
Mastering Reconciliation and Handling Stripe Fees

Connecting your accounts is a major win, but the real test of a great Xero Stripe integration is how it handles the day-to-day grind of your finances. This is where reconciliation comes in, a process that can cause major confusion if it isn't set up correctly from the start.
Getting paid is the goal, but accounting for that income accurately is what keeps your business healthy. We'll demystify how Stripe payments and their pesky fees show up in Xero, turning what could be a headache into a simple, click-to-confirm process.
Understanding the Stripe Payment Feed
Once your integration is live, Stripe starts talking to Xero in a really specific way. Instead of just seeing a lump-sum deposit hit your main bank account a few days later, you’ll get a detailed feed directly from Stripe.
This feed breaks down each customer payment and, crucially, separates out the processing fees. This means Xero can see both the gross amount your customer paid and the net amount that actually lands in your bank after Stripe takes its cut. It’s this separation that makes reconciliation almost effortless.
Creating a Dedicated Account for Stripe Fees
Before you start reconciling, one of the smartest things you can do is create a specific home for your payment processing costs. This gives you a crystal-clear view of how much it's actually costing you to get paid.
We strongly recommend creating a new expense account in your Xero Chart of Accounts.
- Head to Accounting > Chart of Accounts.
- Click Add Account.
- Set the Account Type to ‘Expense’.
- Give it an obvious name, like ‘Stripe Processing Fees’ or a more general ‘Bank Fees’.
- Make sure the default tax rate is set to ‘GST on Expenses’.
Having this dedicated account makes your financial reporting so much cleaner. At tax time, you can see exactly what you’ve spent on payment processing, a vital metric for any online business. For more detailed guidance, check out our guide on managing expenses in Xero.
A Real-World Reconciliation Scenario
Let's walk through a common example to see this in action. Imagine you've sent a Xero invoice for A$1,100 (which is A$1,000 + A$100 GST) to a client. They pay it instantly using the Stripe button on the invoice.
Stripe processes the payment and takes its fee. For a typical domestic card, this is 1.75% + A$0.30. So, the fee on this transaction would be (A$1,100 * 1.75%) + A$0.30 = A$19.55. The actual amount deposited into your bank account is A$1,100 - A$19.55 = A$1,080.45.
Now, jump over to Xero’s reconciliation screen for your bank account. You’ll see the deposit of A$1,080.45. Because the Stripe feed has already given Xero the details, it will automatically suggest a match.
Xero will propose matching the A$1,080.45 deposit against the A$1,100 invoice, while simultaneously allocating the A$19.55 difference to your 'Stripe Processing Fees' expense account. All you have to do is click 'OK'.
This "split transaction" is a massive time-saver. Without the integration, you'd be sitting there with a calculator, manually creating a separate transaction to account for that fee. With the Xero Stripe integration, it just works.
Handling GST on Invoices and Fees
For any Australian business, getting GST right is non-negotiable. The good news is that the integration helps you stay compliant by correctly handling GST on both your sales and the Stripe fees.
- On Your Invoice: When you create that A$1,100 invoice in Xero, you'll apply the correct tax rate. This ensures the A$100 in GST is properly recorded for your Business Activity Statement (BAS).
- On Stripe Fees: Stripe's processing fees are a business expense and, in Australia, they are subject to GST. Your 'Stripe Processing Fees' account in Xero should be set up to account for this, allowing you to claim the GST credit on those fees when you lodge your BAS.
This dual handling keeps your GST reporting accurate on both the income and expense side, which means cleaner books and a happier accountant. And the scale of this is huge: in the last decade, Australian businesses using Stripe processed over A$200 billion in payments, largely driven by the platform economy. Solutions from Xero have been a massive part of this, with Australian businesses on platforms using Stripe surging by nearly 20% in a single recent year alone.
Efficiently tracking Stripe fees and sales revenue also extends to other financial outflows. For businesses with complex payout structures, using specialised commission payment software can be a game-changer, simplifying these processes and integrating smoothly with your overall financial reconciliation. By mastering this, you turn reconciliation from a chore into a simple, automated check-up on your business's financial health.
Troubleshooting Common Integration Issues
Even with a perfectly configured setup, tech can have a mind of its own. It’s frustrating when your Xero Stripe integration doesn’t behave, but the fix is usually pretty straightforward. Most of the time, the problem boils down to a small configuration mismatch or a simple misunderstanding of how the data is meant to flow between the two platforms.
Think of this section as your practical field guide for diagnosing and fixing the most common hiccups. Instead of getting stuck, you can use these tips to quickly pinpoint the problem and get your automated workflow back on track, keeping your financial data accurate and reliable.
Diagnosing Payment Syncing Problems
One of the most frequent headaches is seeing a payment confirmed in Stripe that never shows up against the invoice in Xero. When this happens, your Xero invoice just sits there, marked as 'Awaiting Payment', which can lead to confusion and awkward follow-up emails with clients who have already paid.
Before you go digging too deep, the first place to check is the connection status inside Xero itself.
- First, navigate to Settings, then click on Payment Services.
- Find your active Stripe connection in the list.
- Keep an eye out for any error messages. A common one is a little notice that says (pending authentication), which is Xero's way of telling you the link between the two systems isn't fully active.
If you see that message, it means Stripe can't actually process payments for your Xero invoices yet. You’ll need to re-authenticate the connection to get things moving again. This simple check often resolves syncing problems and ensures future payments are applied correctly without you having to lift a finger.
When Stripe Payouts Don't Match Xero Invoices
Have you ever stared at a lump-sum deposit from Stripe in your bank feed and had absolutely no idea which invoices it covers? It’s a classic reconciliation nightmare, especially when the deposit amount doesn't neatly add up to the total of a few invoices. This usually happens when the integration is struggling to pull in all the necessary transaction details.
More often than not, the problem is in how your bank feed is configured.
-
Bank Account Mismatch: The most common culprit is having your Stripe payouts sent to one bank account while your Xero bank feed is connected to another. Jump into your Stripe dashboard and confirm exactly which bank account receives the payouts. Then, make sure that exact same account is set up with a live bank feed in Xero.
-
Missing Fee Data: Sometimes, the gross payment amount syncs over, but the Stripe fee gets left behind, causing a mismatch. This is where Xero's Find & Match tool becomes your best friend. You can use it to manually select the group of invoices that make up the payout and create a "minor adjustment" or allocate the difference to your 'Stripe Fees' expense account to make everything balance perfectly.
A healthy integration relies on a perfect match between your Stripe payout destination and your Xero bank feed source. Double-checking this alignment is the fastest way to solve nine out of ten reconciliation mysteries.
Correctly Handling Refunds and Chargebacks
Refunds and chargebacks are just a part of doing business, but they can create real chaos in your books if they aren't handled correctly. A common mistake is to just delete the original invoice in Xero, which completely throws your revenue reporting out of whack and messes up your audit trail.
The right way to do this involves creating a credit note in Xero.
- First, process the refund inside your Stripe dashboard as you normally would.
- Next, find the original paid invoice in Xero that the refund relates to.
- From there, create a Credit Note for the exact amount you refunded.
- Finally, apply this credit note directly to the original invoice.
Following these steps creates a clean paper trail. It correctly reduces your reported income for that period and ensures your accounts receivable balance is spot-on. For chargebacks, you should follow a similar process but also remember to create a separate expense transaction to account for any non-refundable dispute fees Stripe might charge you. This keeps every part of the transaction accounted for.
Solving Multi-Currency Transaction Errors
For those of us serving international clients, multi-currency transactions can add another layer of complexity. An error might pop up if a payment is made in USD, but your Xero and Stripe accounts are primarily set up for AUD without the right settings enabled.
The key here is making sure your Xero plan actually supports multiple currencies and that everything was configured correctly from the start.
- Check Your Xero Plan: First, verify that your Xero subscription includes multi-currency capabilities. Not all of the lower-tier plans do.
- Review Your Currency Settings: When you originally set up the Stripe payment service in Xero, you need to ensure you've configured it to handle payments in the specific foreign currencies you accept.
If you receive a foreign currency payment and it fails to sync, it's almost always because that particular currency hasn't been enabled in your payment service settings. By tackling these common issues proactively, you can maintain a robust and reliable Xero Stripe integration that actually saves you time instead of creating more work.
Your Top Questions Answered
When you're trying to connect Stripe and Xero, a few common questions always seem to pop up. I've worked through this integration with countless Australian businesses, so let's tackle the big ones head-on.
Can I Get My Old Stripe Transactions into Xero?
Great question, and the short answer is yes, but the native integration won't do it for you. It's built to sync data from the moment you switch it on, not to look backward. Trying to manually import months or years of historical Stripe data, every sale, fee, and refund, is a recipe for disaster. It's incredibly time-consuming and almost guaranteed to have errors.
If you need to get your history sorted, your best bet is a third-party automation tool. Specialised connectors are designed specifically for this job. They can pull your entire transaction history, map it correctly, and get it reconciled, giving you a clean, complete financial picture in Xero right from the start.
How Does the Integration Handle GST?
This is a big one for any Aussie business. It's crucial to understand that while the integration is great at moving data around, it doesn't automatically configure your tax settings.
You're still in the driver's seat when it comes to GST. You need to make sure your tax rates are set up properly in both your Xero and Stripe accounts. Stripe can be told to collect the right GST on your sales, and the integration will pull that information across. However, it's still up to you to ensure your Xero invoices apply the correct tax codes for accurate reporting and compliance. Think of the integration as the courier, but you're the one who packs the box correctly.
What's the Right Way to Handle Refunds and Chargebacks?
Getting your revenue reporting right means handling refunds properly. When you refund a customer in Stripe, the best practice is to jump into Xero and create a credit note for the original invoice. Applying this credit note correctly reverses the income, all while keeping a perfect paper trail.
Chargebacks follow a similar path. Create a credit note to reverse the sale, but don't forget to account for the dispute fee Stripe charges you. That fee needs to be recorded as a separate business expense. This way, every piece of the transaction, including the cost of the dispute, is accurately logged in your books.
The single biggest mistake I see is people just deleting the original invoice when a refund happens. Doing this throws your reports out of whack and breaks your audit trail. Always, always use a credit note. It keeps your records clean and compliant.
What’s the Most Common Reconciliation Mistake People Make?
Letting it all pile up until the end of the month. Hands down, this is the most frequent blunder. Business owners put off their bank rec, and when they finally face it, they’re met with a confusing mess of transactions that are a nightmare to match. The whole point of the Xero Stripe integration is that it provides near real-time data, so you should use it that way!
The smart move is to make reconciliation a small, regular habit. Spend just five or ten minutes each week checking the matches Xero suggests and clicking "OK". It turns a task everyone dreads into a simple, manageable check-in on your business's financial health.
Ready to stop juggling multiple apps and get your business operations in order? Payly brings smart invoicing, time tracking, e-signatures, and document management together in one simple platform built for Australian service businesses. See how much time you can get back by visiting us at https://www.payly.com.au.
Payly Team
Sharing insights and strategies to help service businesses thrive. Follow Payly for more tips on time tracking, invoicing, and business operations.
Related Articles


Ready to streamline your business?
Join thousands of freelancers and agencies who use Payly to track time, send invoices, and get paid faster.