How to Use Xero Software for Your Australian Business
Discover how to use Xero software with our practical guide for Australian businesses. We cover setup, invoicing, BAS, and streamlining your workflow with Payly.
Payly Team
February 24, 2026
Getting your Xero setup right from the get-go is the difference between a streamlined accounting system and a digital shoebox full of headaches. It's all about building a solid foundation. This means creating your account with the right Australian settings, getting your bank feeds hooked up, and making sure your chart of accounts actually makes sense for your business.
Nail these first few steps, and you'll find invoicing, reporting, and staying on top of your GST obligations so much easier down the track.
Your Xero Quick Start Guide for Australian Businesses
Jumping into new accounting software can feel daunting, but Xero is genuinely built to make your financial life simpler, not more complicated. Think of this guide as your roadmap, designed specifically for Australian service businesses. We're cutting through the noise to show you exactly what to do to create a robust, compliant system that saves you time and stress.
Getting your account set up properly isn't just about ticking boxes. It's the strategic first move that dictates how smoothly everything else will run, from lodging your BAS to integrating powerful tools like Payly.
Before You Start: Get Your Details in Order
Honestly, the best thing you can do is get all your key business information together before you even head to the Xero website. It makes the whole sign-up process a breeze. A little prep work here saves a lot of backtracking later.
Make sure you have this info ready to go:
- Your official Business Name and ABN: Use the exact legal name tied to your Australian Business Number. No nicknames or trading names just yet.
- Contact Details: Your main business address, email, and phone number.
- Financial Year End: For almost every Aussie business, this will be 30 June.
- GST Status: You'll need to know if you're registered for GST and how often you report (monthly or quarterly).
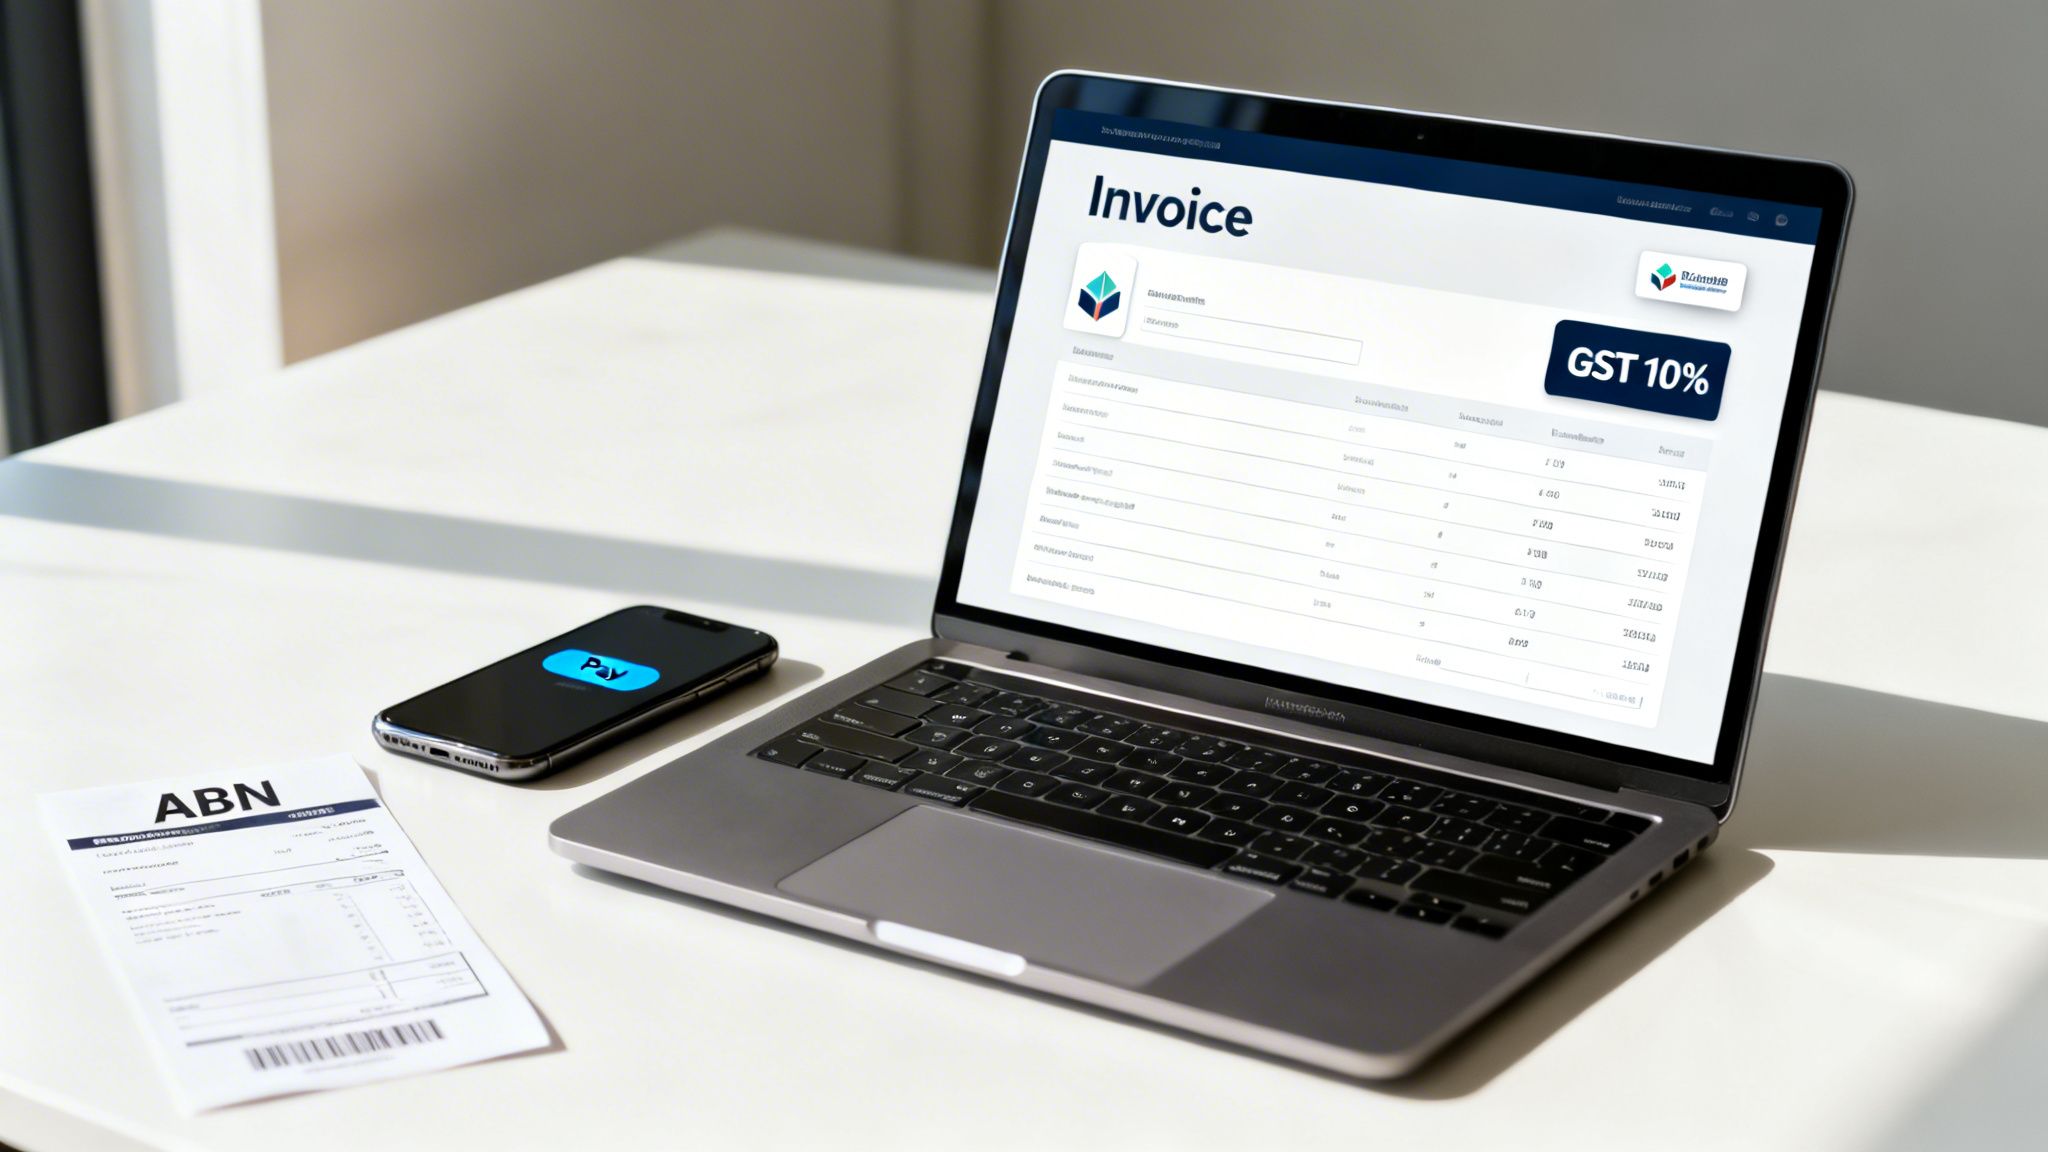
With these details in hand, signing up is a piece of cake. The initial page is clean and straightforward, as you can see.
They make it easy with a no-credit-card trial, so there’s really no reason not to jump in and get a feel for it.
To help you stay on track, here’s a quick checklist of the essential first steps. It’s easy to miss something crucial in the excitement of getting started, so use this to make sure your foundation is rock-solid.
Xero Initial Setup Checklist for Australian Businesses
| Setup Step | Key Action | Why It's Important |
|---|---|---|
| Gather Business Info | Collect your ABN, legal name, GST details, and financial year-end date. | Accuracy from the start prevents major headaches with the ATO later on. |
| Create Xero Account | Sign up for a trial or paid plan on the Australian Xero website. | This creates your unique organisation file where all your financial data will live. |
| Configure Org Settings | Enter your business details, upload your logo, and set your financial year. | Customises invoices and reports, ensuring they look professional and are legally compliant. |
| Connect Bank Feeds | Securely link all business bank accounts, credit cards, and PayPal accounts. | Automates transaction imports, which is the cornerstone of Xero's time-saving power. |
| Review Chart of Accounts | Customise the default accounts to match how your service business operates. | Ensures you can track income and expenses in a way that provides meaningful insights. |
| Set Invoice Branding | Create an invoice template with your logo, payment terms, and bank details. | Professionalises your brand and makes it easier for clients to pay you on time. |
Following this checklist ensures you won't just have a Xero account, but one that’s properly configured to work for your Australian business from day one.
The Magic of Bank Feeds
If there’s one step you can’t afford to skip, it’s this one. Connecting your business bank accounts lets Xero automatically pull in all your transaction data every day. This "live bank feed" is the engine that powers nearly all of Xero’s best features, especially bank reconciliation.
You can connect pretty much any account-cheque, savings, credit cards, and even PayPal. Xero has secure links with all the major Aussie banks like CommBank, NAB, ANZ, and Westpac. The whole process is done through a secure portal, so Xero never actually sees or stores your banking login details.
By getting your transactions imported automatically, you completely eliminate the soul-crushing job of manual data entry. This doesn't just save you hours of work; it drastically cuts down the risk of human error that can lead to messy, expensive accounting mistakes.
There's a reason Xero feels so dominant in Australia-it’s because it’s incredibly well-suited to local freelancers and small businesses. Its impressive 18.9% annual revenue growth easily outpaces the wider Aussie tech market. Since expanding here, Xero has captured a huge chunk of its 4.1 million global subscribers right here on our shores. If you’re interested in the numbers, this report on high-growth tech stocks in Australia offers some great context.
Mastering Invoicing to Get Paid Faster
For any service-based business in Australia, getting paid on time is everything. Let's be honest, slow payments are more than just an annoyance; they can seriously stall your growth and add a lot of stress you don't need. This is exactly where getting the hang of Xero for your invoicing can completely change the game. It stops being a chore and becomes your best tool for getting paid quickly and reliably.
It’s about so much more than just sending out a bill. With Xero, you can build a professional, slick, and automated system that not only impresses clients but also cuts down on your admin time, keeping your bank balance healthy. Let's walk through how to set it up to make a real impact.
Creating Professional Branded Invoices
Think of your invoice as one of the last, and most important, interactions you have with a client on a project. It needs to look professional. Xero’s invoice templates are brilliant for this because you can customise them to match your brand perfectly.
To get started, head over to Organisation settings, then click into Invoice settings. This is where you'll upload your logo, pick your brand fonts, and add your standard payment terms and bank details. I always tell people to think of this as creating their master template.
Here’s a small but powerful tip: make your payment terms incredibly clear. Instead of just putting "Net 30," write something specific like, "Payment due within 30 days of invoice date." This tiny change removes any confusion and sets a firm, professional expectation right from the start.
From Quote to Invoice Instantly
One of the best time-savers for service businesses is Xero’s quote-to-invoice workflow. You can build out a detailed quote right there in the system and shoot it off to your client. The real magic happens when your client views it-they can accept it online with a single click.
As soon as they accept, Xero lets you convert that quote into a ready-to-go invoice in seconds. This isn't just about saving time; it completely eliminates those little copy-paste errors that can happen when you're manually creating invoices from quotes. It makes your whole process feel seamless and buttoned-up.
For more on the basics, check out our guide on how to send a professional invoice.
Automating Reminders to Nudge Late Payers
Nobody enjoys chasing up late payments. It's awkward, takes up valuable time, and can strain client relationships. Xero’s automated invoice reminders are your secret weapon here, letting you follow up without any of the manual legwork.
You can set up a friendly sequence of emails that automatically go out when an invoice is getting close to its due date or becomes overdue. You get to decide on the timing and exactly what the messages say.
A well-timed, automated reminder is often all it takes to prompt a payment. It takes the personal awkwardness out of the follow-up, protecting your client relationships while making sure you don't get forgotten. In fact, businesses using automated reminders get paid up to 14 days faster on average.
Getting Paid with Online Payment Gateways
The final piece of the puzzle is making it ridiculously easy for clients to pay you. Xero connects directly with payment gateways like Stripe and PayPal. When you connect one of these, a big "Pay Now" button gets added to the invoices you email.
When your client clicks it, they're taken straight to a portal where they can pay on the spot with their credit card. This one simple feature removes all the friction from the payment process. It’s no surprise that invoices with an online payment option get paid, on average, twice as fast as those without.
As your business grows, you might even consider delegating invoicing and financial admin to free up even more of your time for what you do best.
Taming Your Expenses and Bank Reconciliation
Let's be honest, managing expenses and reconciling accounts are two jobs that can make any business owner's eyes glaze over. They often feel like a never-ending cycle of tedious data entry. But here's the good news: learning to use Xero properly can turn this multi-hour headache into a quick, five-minute daily task.

The secret isn't some complex accounting trick; it's about letting Xero's automation do the heavy lifting for you. By connecting live bank feeds and setting up a few smart rules, you'll shift from manual data entry to simple, one-click approvals. This gives you a crystal-clear, real-time picture of your financial health, without the pain.
Embrace the Power of Live Bank Feeds
As we touched on earlier, connecting your bank accounts is the non-negotiable first step. Once that's done, every transaction that hits your business bank account-both money in and money out-appears automatically in your Xero dashboard. This is where the magic begins.
Instead of manually typing in every single expense from a bank statement, you’re simply reviewing a list of transactions that Xero already knows about. Your job transforms from data entry clerk to financial reviewer.
This shift is huge. It doesn’t just save an incredible amount of time; it also virtually eliminates the typos and missed transactions that can throw your books completely out of whack.
Master One-Click Reconciliation
With your transactions flowing in, the Reconcile tab becomes your new best friend. This is where Xero really shines, actively trying to match the money you've spent or received with existing invoices, bills, or previous transactions.
For example, when a client pays an invoice you sent through Xero, the software sees the incoming payment from your bank feed. It then automatically suggests matching that payment to the corresponding outstanding invoice. If it’s correct, you just click the green "OK" button. Job done.
This is the core of Xero's famous reconciliation process. You're not doing complex double-entry bookkeeping; you're simply confirming that Xero's smart suggestions are correct. It’s a process of verification, not origination.
For a deeper look into the principles of good financial management, this guide to tracking expenses effectively is a fantastic resource.
Automate Recurring Expenses with Bank Rules
Now, here’s where you can unlock some serious time savings. Think about all the regular expenses your business has each month: your Adobe subscription, office rent, web hosting, or phone bill. Manually categorising these same transactions every single time is a massive waste of your time.
Bank rules are the perfect solution. You can essentially teach Xero how to handle these transactions for you.
For instance, you can set up a rule that says:
- If a transaction contains the text "Officeworks," then automatically code it to the "Stationery & Office Supplies" expense account.
- If a transaction is from "GoDaddy," code it to the "Website & Hosting" account.
- When a payment is made to "Telstra," automatically assign it to the "Telephone & Internet" expense account.
Once a rule is created, Xero applies it every time a matching transaction appears. This means dozens of transactions can be reconciled for you before you even log in, saving you hours of manual work over a year. We cover more on this in our detailed article on how to track expenses in Xero.
Go Paperless with Hubdoc Integration
Every Xero business subscription in Australia includes a free Hubdoc account, and it’s a game-changer. Hubdoc is a powerful tool designed to capture all your bills and receipts, then sync them directly into Xero.
You can forward email receipts to your unique Hubdoc email address or use the mobile app to snap a photo of a paper receipt from a supplier. Hubdoc's technology then reads key information-like the supplier, date, amount, and GST-and creates a transaction in Xero with a digital copy of the receipt attached.
This workflow is fantastic for a few reasons:
- You're always audit-ready: Forget digging through shoeboxes for faded receipts. Every expense has its source document attached directly to the transaction in Xero.
- It streamlines bill payments: When a supplier invoice arrives in Hubdoc, it can be pushed to Xero as a "Bill to Pay," making it easy to track and manage what you owe.
- It reduces manual entry: Hubdoc's data extraction automates the creation of expense transactions, further cutting down on what you need to do by hand.
By combining live feeds, smart matching, bank rules, and Hubdoc, you can transform expense management from a reactive chore into a proactive, automated, and incredibly efficient system.
Making Sense of GST and Your BAS
If you’re running a business in Australia and you’re registered for GST, then lodging your Business Activity Statement (BAS) is one of those non-negotiable tasks. It can feel like a monster of a job, but this is where Xero truly shines, turning a potential headache into a straightforward, manageable process. Think of it as your command centre for staying on top of your tax obligations, accurately and on time.
The magic happens in the background. As you go about your day-to-day work, Xero automatically keeps a running tally of the Goods and Services Tax (GST) on your sales and your business purchases. Every invoice you send and every bill you pay is another piece of the puzzle that Xero puts together for you.
How Xero Handles the GST Maths for You
The whole system is built around tax rates. Your Australian Xero account comes pre-loaded with the right tax codes from the get-go, like "GST on Income" and "GST on Expenses," both correctly set at 10%. You'll also see codes for things that don't attract GST, like GST-free sales or capital purchases.
So, when you're creating an invoice or entering a bill from a supplier, you just select the correct tax rate for each item. From there, Xero does all the heavy lifting. It calculates the GST you've collected (which you owe to the ATO) and the GST you've paid (which you get to claim back).
This constant, real-time calculation means you can say goodbye to that end-of-quarter scramble with spreadsheets and a calculator. The numbers are always organised and ready when you are.
Your BAS Report, Ready in a Few Clicks
When BAS time rolls around, generating the report in Xero is almost laughably easy. You just head over to the Reports menu and look for the Business Activity Statement under the "Tax" section. Pick the right reporting period, and voilà, Xero fills out the statement for you.
It pulls all the numbers it's been tracking straight from your sales and expense records, populating the key labels you need:
- G1 (Total sales)
- 1A (GST on sales)
- 1B (GST on purchases)
This level of automation is a game-changer. It dramatically cuts down the risk of making a clumsy manual error and frees up hours of your time. What was once a painstaking job can now be sorted in minutes.
Xero's knack for simplifying tax compliance is a huge reason it’s so popular with Aussie small businesses. Accountants and bookkeepers love it too; the ability to collaborate in real-time makes reviewing and lodging a client’s BAS far more efficient than wrestling with old-school desktop software.
A Quick Review Before You Lodge
Once Xero generates the BAS, it's your turn to do a quick sanity check. The best part is you can click on any number in the report to see a full list of the transactions that make up that total. This is your chance to catch anything that looks a bit off, like a supplier bill you accidentally marked as GST-free when it wasn't.
After giving it a final once-over, you can lodge your BAS directly with the Australian Taxation Office (ATO) right from inside Xero. It uses a secure connection for electronic lodgement, which is how the ATO prefers you to do it anyway. No more clunky portals or downloading and uploading files-just a final check and a click to send it off. It makes a once-dreaded task feel seamless.
Supercharge Xero with the Payly Integration
Xero is an absolute workhorse for accounting, but for Australian service businesses, its real magic happens when you pair it with the right operational tools. Connecting it with an all-in-one system like Payly creates a powerhouse workflow that all but eliminates manual data entry, slashes the risk of costly errors, and, most importantly, gives you back your time.
This isn't just about bookkeeping anymore. It’s about managing your entire client journey-from tracking billable hours and wrangling documents right through to getting paid-all from one connected ecosystem.
Why Connect Payly and Xero?
The biggest win here is simple: you stop doing the same job twice. Instead of tracking time in one app, building invoices in another, and storing client contracts somewhere else entirely, you create a single source of truth. This integration is specifically built to save service businesses a huge amount of time and money by replacing a messy stack of disconnected software.
For freelancers, agencies, and consultants, this means:
- No More Manual Timesheet Invoicing: Hours tracked in Payly are converted into detailed Xero invoices with just a few clicks. It’s that easy.
- A Smoother Client Experience: Combine Payly’s document management and e-signature features with Xero's professional invoicing for a seamless client journey from start to finish.
- Drastically Reduced Admin: When data flows automatically, you spend less time bogged down in admin and more time on actual billable work.
This integrated approach fundamentally changes how you run your business. It's not just about being more efficient; it's about building a professional, error-free system that lets you scale and ensures you get paid faster for your hard work.
Connecting Your Accounts: A Step-By-Step Guide
Getting Payly and Xero talking to each other is a quick, one-off job that takes just a few minutes. You definitely don’t need to be a tech whiz to get it done.
Here’s the rundown on getting connected:
- First, log in to your Payly account and head to your main dashboard.
- Look for the 'Integrations' section-it's usually in your settings or the main navigation menu.
- Find and select Xero, then click the "Connect to Xero" button. This will securely redirect you to the Xero login page.
- Log in with your Xero credentials and grant Payly permission to access your organisation's data. This is a standard, secure authorisation process that keeps your data safe.
- Once you’ve authorised it, you’ll be sent straight back to Payly. That’s it! The connection is live, and your data can now sync between the platforms.
Once connected, data flows accurately from timesheets to invoices, making GST calculations and BAS lodgements with the ATO much simpler.
This flowchart gives you a great visual of how Xero streamlines the whole GST and BAS process from start to finish.
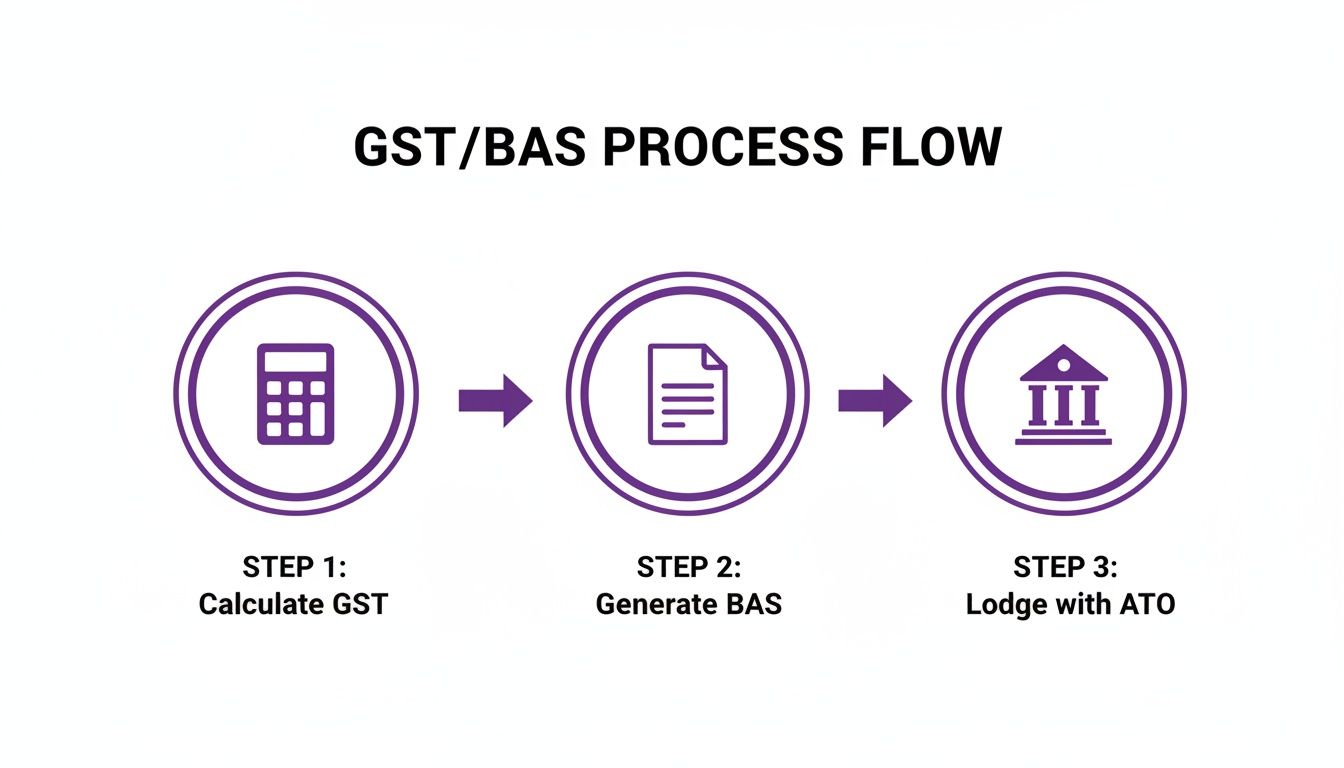
As you can see, it’s a clear path from calculating what you owe to lodging it directly with the tax office, keeping you compliant without the usual headaches.
How the Integration Works in the Real World
This is where you'll really feel the difference. Imagine your team has just wrapped up a big project, and all their billable hours are perfectly logged in Payly. The old way involved manually creating a new invoice in Xero and painstakingly re-entering every single line item. Not anymore.
With the integration active, you simply select the tracked time in Payly and watch it automatically generate a professional, branded invoice in Xero. It pulls across all the crucial details-line items, rates, descriptions, and correct GST calculations-ready to be fired off to your client. It’s a huge time-saver. You can find more information about how Payly can improve your business operations.
The table below breaks down the practical differences you'll notice day-to-day.
Payly and Xero Integration Feature Comparison
| Business Task | Using Xero Standalone | Using Xero with Payly Integration |
|---|---|---|
| Timesheet Tracking | Manual entry or separate app needed | Time is tracked in Payly and syncs automatically |
| Creating Invoices | Manually create invoices line by line from timesheets | Invoices are generated automatically from tracked time |
| Client Onboarding | Handle contracts & documents separately | Manage contracts, e-signatures & documents in Payly |
| Data Accuracy | Higher risk of human error from manual data entry | Data syncs automatically, ensuring consistency |
| Workflow Efficiency | Multiple steps across different platforms | A unified process from time tracking to getting paid |
This side-by-side view makes it clear how much friction the integration removes from your core business processes, freeing you up to focus on what really matters.
Xero’s strong financial footing in Australia also provides peace of mind. Its H1 FY26 operating income soared to A$105 million, a massive increase from the previous year, with profit margins widening to 12.8%. For any business owner or operations manager, that kind of stability is reassuring. By using the Payly integration to onboard workers and manage finances, businesses have seen administrative savings of up to 95% compared to juggling a stack of separate tools. Find out more about Xero's financial performance and future stability.
Your Top Xero Questions Answered
Diving into new software always comes with a few questions. It’s completely normal, and over the years, I've heard them all. To save you some time, I’ve pulled together the most common queries I get from Australian business owners, with clear, practical answers to get you sorted.
Can I Actually Run My Business from the Xero App?
You absolutely can. In fact, for many service-based business owners I work with, the Xero Accounting app has become their command centre. It’s surprisingly powerful, and for 61% of businesses, mobile is now their main tool.
Think about what you can get done right from your phone:
- Invoice on the spot. Just finished a job? Create and send the invoice before you even leave the client's site.
- Reconcile during downtime. That five minutes waiting for a coffee is all you need to clear a few bank transactions.
- Kill the shoebox of receipts. Snap a photo of a receipt with Hubdoc, and it's instantly uploaded and stored.
- Check your vitals. A few taps are all it takes to see your cash flow or pull up a quick profit and loss report.
Xero is constantly improving its mobile experience because they know business happens everywhere, not just behind a desk.
Is Xero Too Complicated if I’m Not an Accountant?
Not in the slightest. This is precisely where Xero shines and why I recommend it so often. It was built from the ground up for business owners, not just bookkeepers.
The whole platform uses plain English, hiding the complex accounting jargon that makes traditional software so intimidating. Things like bank feeds, reconciliation suggestions, and simplified BAS reporting turn what used to be a headache into a series of simple clicks.
The real magic of Xero is that it lets you focus on what you know: what you sold and what you bought. You don't need to get bogged down in debits and credits. The software handles all that technical stuff in the background, so you can just get on with it.
It’s this user-friendly design that makes collaboration between you and your accountant so much smoother. You can confidently handle the daily admin, and they can easily access the data they need to give you proper advice.
How Does Xero Stack Up Against MYOB or QuickBooks in Australia?
While they're all solid platforms, Xero has really cemented its place as the go-to for small and service-based businesses in Australia. You just have to look at its digital footprint. In the world of online advertising for accounting software, Xero pulls in a massive 50.19% click share in Australia, leaving competitors like MYOB and QuickBooks far behind. That tells you where most freelancers and agencies are looking first. You can dig into the competitive landscape of Australian payroll software for more on that.
This popularity really comes down to its incredible ease of use. A new Aussie business can genuinely get set up in under 15 minutes, invite their accountant, pull in historical data, and get payroll running for Single Touch Payroll (STP) reporting-which has been mandatory since 2018.
Here’s a quick rundown of where each one typically shines:
- Xero: Known for its beautiful interface, massive app ecosystem, and seamless collaboration. It’s the modern favourite.
- MYOB: A long-standing Aussie player, particularly strong in more traditional industries like construction and retail, though its cloud product is now a serious contender.
- QuickBooks Online: A global giant with fantastic features, especially if you’re a business managing physical inventory.
For most modern Australian service businesses, though, Xero’s simplicity and slick integrations-like the one with Payly-just make more sense.
Just How Secure Is My Financial Data in Xero?
This is a big one, and rightly so. The short answer is: extremely secure. Xero invests in a level of security that would be practically impossible for a small business to achieve on its own.
They use multiple layers of protection to keep your sensitive information locked down tight.
- Bank-Level Encryption: Your data is encrypted when it's sent across the internet and while it's stored on their servers.
- Fortified Data Centres: Your info is kept in highly secure, enterprise-grade facilities with heavy physical and network protection.
- Two-Step Authentication (2SA): I strongly recommend turning this on. It adds a crucial second layer of security to your login, making it incredibly difficult for anyone else to get in.
- Constant Monitoring: Xero undergoes regular, independent security audits to make sure its defences are up to date against the latest threats.
You can rest easy knowing your financial data is protected by industry-leading security, giving you one less thing to worry about.
Ready to stop juggling multiple apps and start managing your business in one place? Payly combines time tracking, invoicing, document management, and e-signatures into a single, streamlined platform that integrates perfectly with Xero. Start your free 14-day trial today and see how much time you can save.
Payly Team
Sharing insights and strategies to help service businesses thrive. Follow Payly for more tips on time tracking, invoicing, and business operations.
Related Articles
Ready to streamline your business?
Join thousands of freelancers and agencies who use Payly to track time, send invoices, and get paid faster.